This is the second post of the Create and deploy you Blog with Hugo, GitLab and AWS series.
This post will focus on setting up AWS and deploying our blog manually to an S3 bucket.
If you want to start with the first post it’s available here.
Tech Stack
- Hugo for our SSG
- GitLab to host our code
- GitLab CI/CD for packaging and releasing
- AWS S3 to host our static site
- Cloudfront as our CDN
S3 Bucket Configuration
In AWS create a new S3 bucke, uncheck the Block public access options. Name the bucket the same as the domain you’ll be using for your site.
Now head over to your new bucket and find the properties tab. Scroll down until you see Static website hosting edit and enable it. When you select enable, there will be a few additional options. Select Host a static website, index.html for the Index document, and 404.html for the Error document.
Let’s head over to the Permissions tab and add a policy like the following one:
{
	"Version": "2012-10-17",
	"Statement": [
		{
			"Sid": "PublicRead",
			"Principal": "*",
			"Effect": "Allow",
			"Action": "S3:GetObject",
			"Resource": "arn:aws:s3:::randomprimate.com/*"
		}
	]
}
Remember to change the ARN to your bucket’s ARN.
Now let’s give a test run. Build your site with hugo -D and upload the content within the public directory to your bucket.
Navigate back to the Properties tab and find the Static Host block again. You can now see a URL displayed, which you can use to access your bucket.
When the new browser tab opens up, you should view your site. Note that page routing won’t work because we still have to configure our domain.
Initial Route 53 Configuration
For the Route53 setup, we either start with a domain purchased through AWS or with an external service such as Name.com or GoDaddy. If you bought through AWS, we are good to go for the next step. If you have your domain elsewhere, take a look at this simple guide to migrate it over to AWS.
Certificates with ACM
In AWS look for the Certificate Manager service. Once there, press the Request New Certificate button and choose the public certificate type.
On the next screen, add your domain name. In my particular use case, I plan to have subdomains point to example apps, so I want to cover the root domain example.com, any potential app name like myapp.example.com, and also cover the www subdomain so I’ll be adding my domain name and a wildcard *.example.com to cover all of these scenarios. Submit the request.
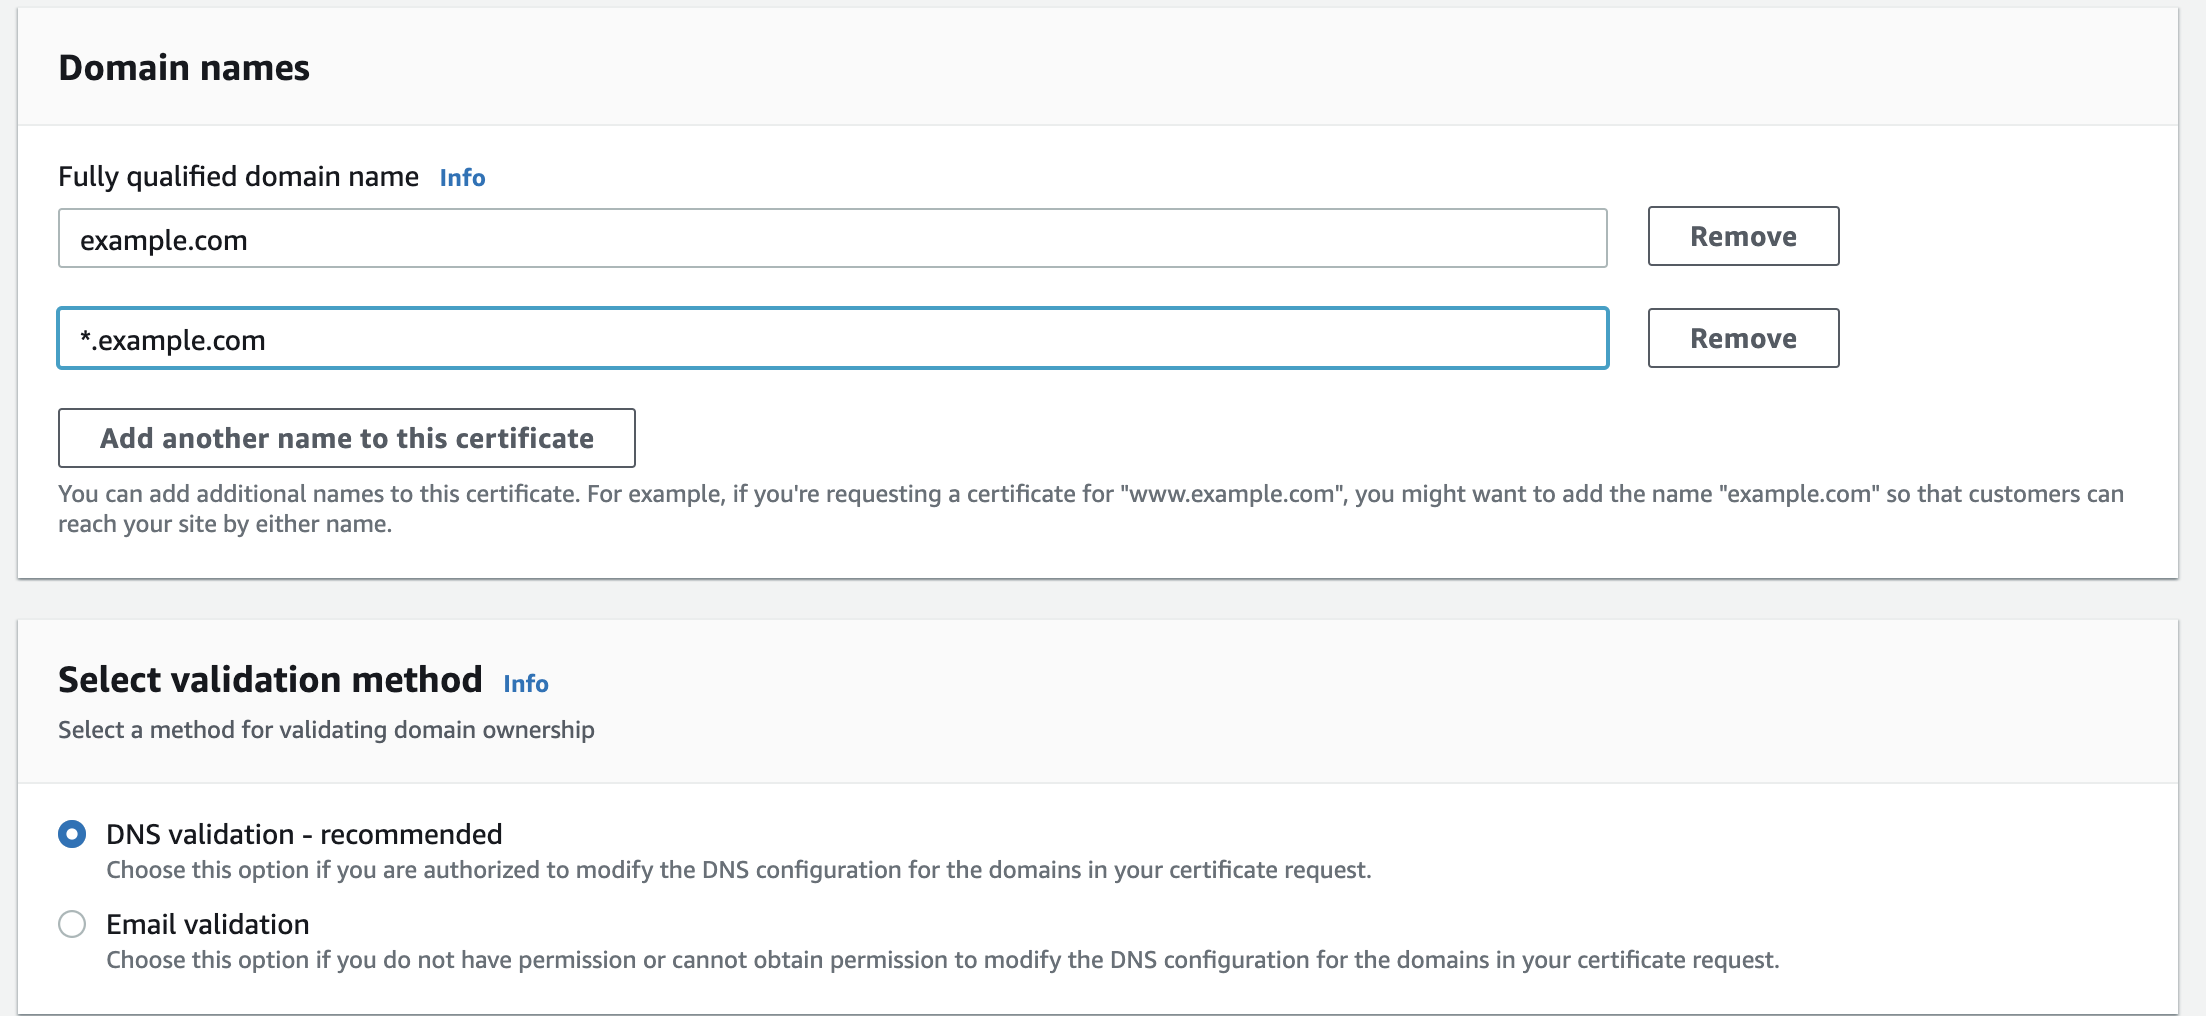
Go into your certificate, and you’ll notice it’s in a Pending validation state. Scroll down to domains and press on the Create records in Route 53. Accept the AWS proposed changes for Route 53 and now give it a few minutes for the status to change.
Subfolder Redirect Issues
CloudFront does not redirect to a subfolder’s root object, and Hugo’s URLs require this pattern. So we have two options:
- When configuring CloudFront, instead of selecting the S3 bucket name, we will paste in the S3 URL. This option requires the bucket to be publicly readable, fitting most use cases.
- Create a Lambda Edge function that will listen to requests and redirect them accordingly.
I tend to prefer simple solutions, so I’ll go with option one, but here is a link to the AWS docs to implement the second option.
CloudFront
Head over to CloudFront in your AWS web console. Select to create a new distribution. In the following, long, form start by choosing the Origin domain. Remember the decision taken in the previous section; we will not just select the S3 bucket identifier. Instead, head over to your S3 bucket and in the hosting block within properties you’ll find a URL, copy this and paste it into the Origin Name. Remove the https:// and don’t mind that there are no options to select that match this value.
Now look for the Viewer section and choose Redirect HTTP to HTTPS from the Viewer protocol policy.
In the Settings block, you’ll find Price class, you can choose the best performance default option, but it will be more expensive. For my use case, I only need North America and Europe.
Look for Custom SSL certificate and find the newly created certificate from the dropdown in the same block.
Finally, add a description at the end of the block and submit the changes.
Final Route53 Configuration
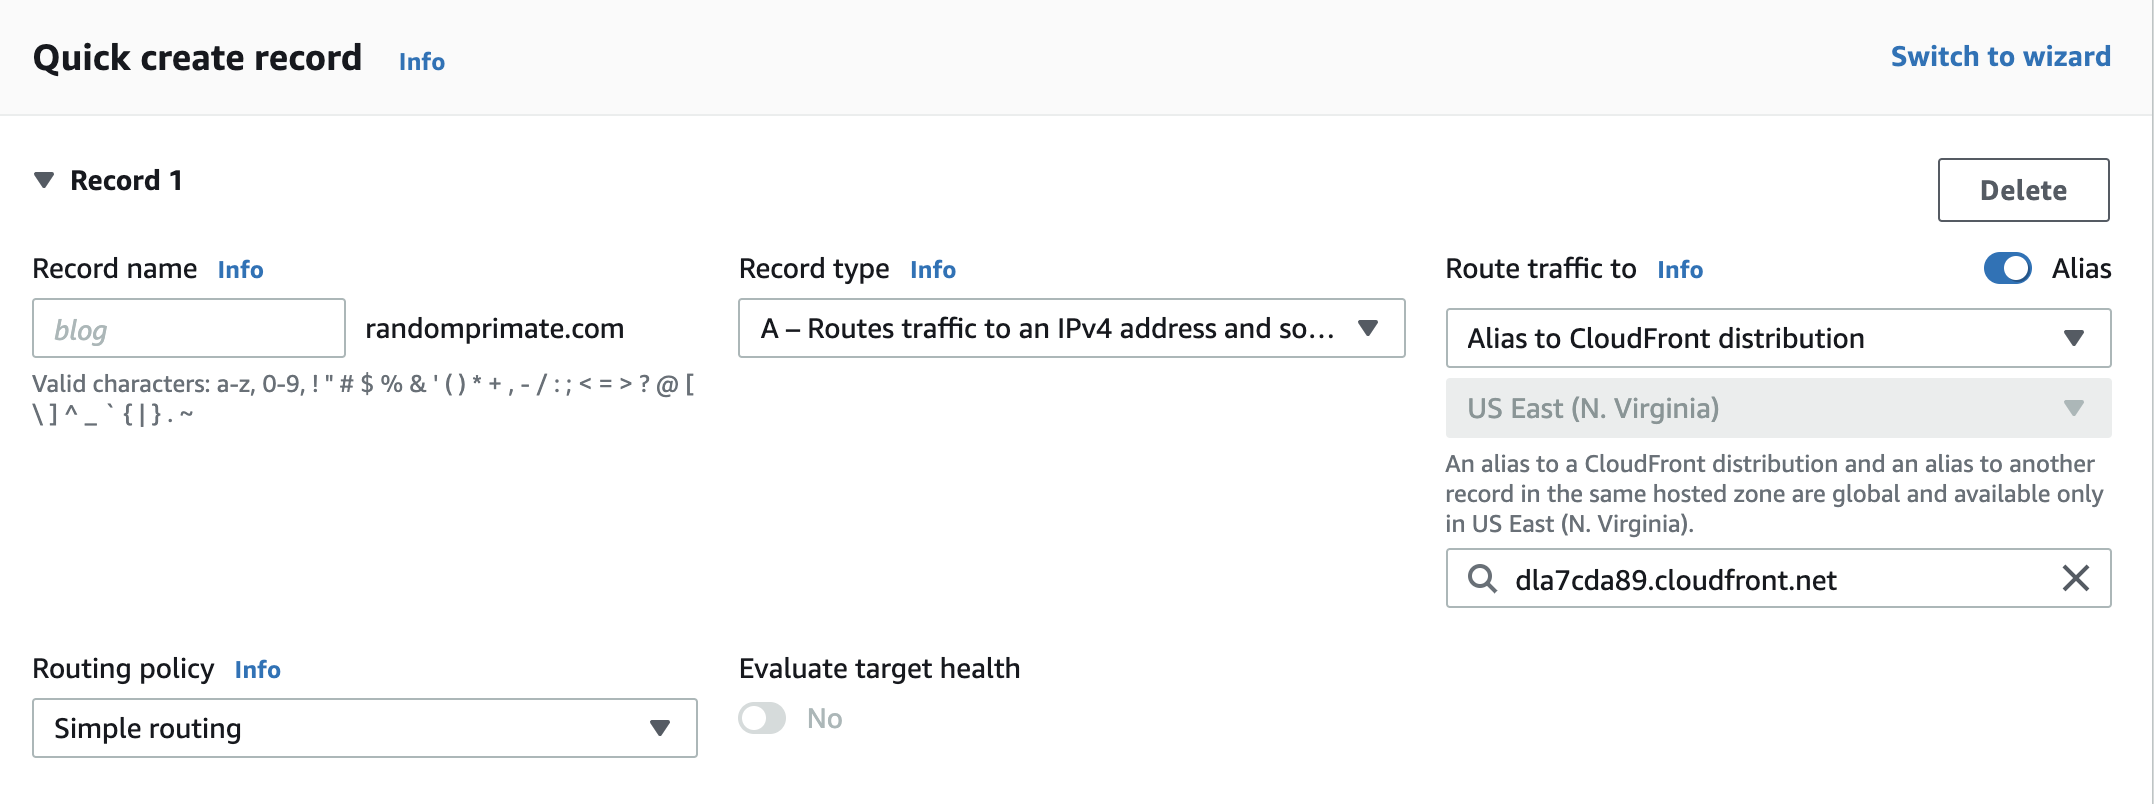
We’ll now create an A record in the hosted zone containing your domain. Press on the Create Record button, select A record as the record type, switch on alias, select Alias to CloudFront distribution and paste in the CloudFront URL which you’ll find on the main page of your distribution; it has a format similar to this: dla7cda89.cloudfront.net.
Final Thoughts
Test your new site by pointing your browser to your domain. It should now be working along with pages and posts, so navigate your blog and make sure it behaves as intended. That’s it for this post. The next step is to setup up GitLab CI/CD for automated deployments after pushing our changes to GitLab.
References
- Hugo multilingual site deploy to aws s3 error “AccessDenied.” (n.d.). Stack Overflow. Retrieved January 16, 2022, from https://stackoverflow.com/a/63447080/4059386